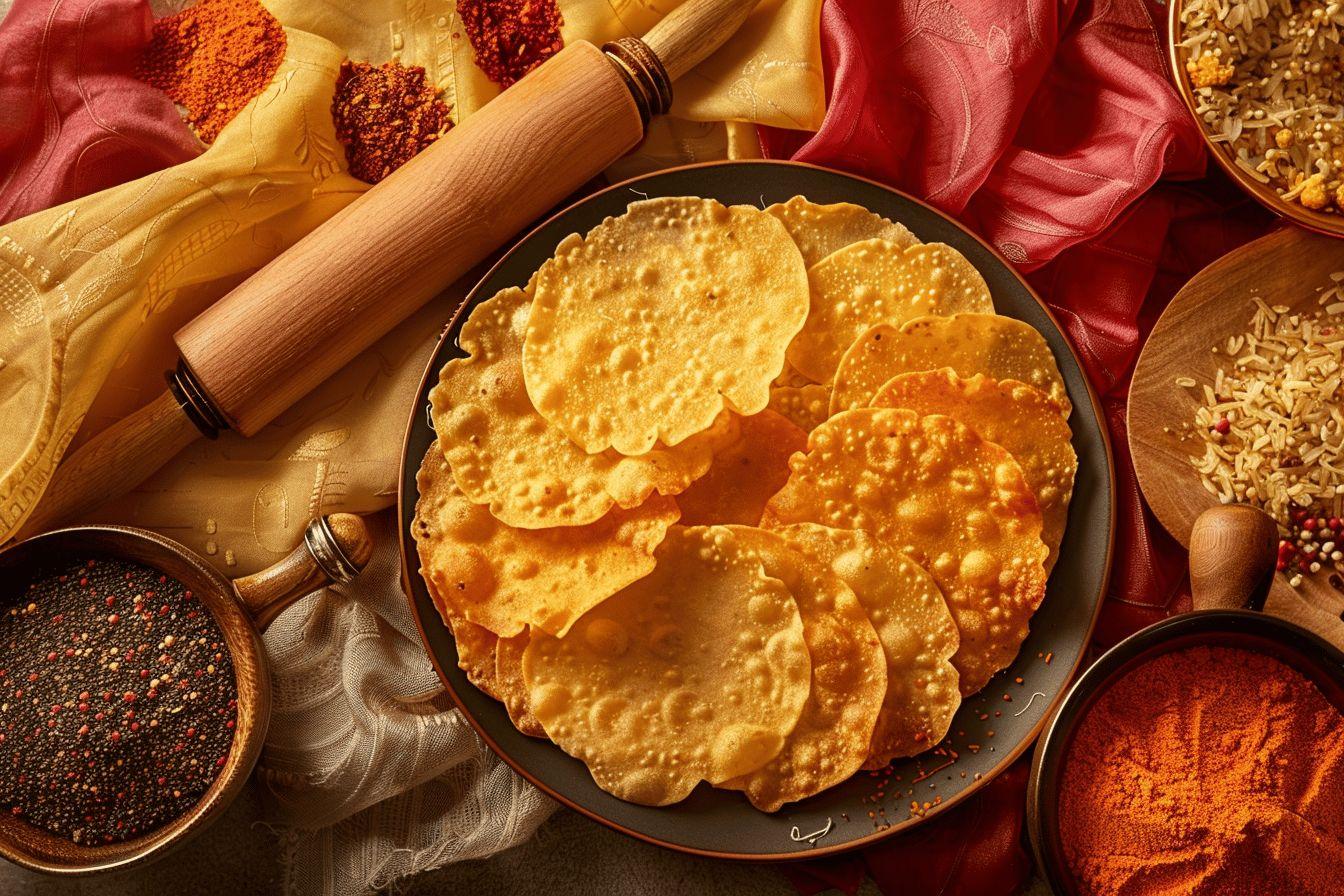
Creating authentic poppadoms at home offers a delightful culinary adventure that elevates any Indian meal. These crispy, paper-thin delicacies transform from simple dough into spectacular accompaniments that rival restaurant versions. The satisfying crack of a freshly made poppadom provides texture contrast that store-bought varieties simply cannot match. With proper techniques and ingredients, anyone can master this traditional Indian flatbread in their own kitchen.
Understanding poppadoms vs. papads: What’s the difference?
The terms poppadom and papad refer to the same delicious crispy flatbread, though with important distinctions. Papad is the original Indian name used throughout the subcontinent, while poppadom represents the anglicized version commonly found in Western restaurants and stores. This terminology difference reflects how culinary traditions evolve through cultural exchange.
Technically speaking, papads describe the dried, uncooked discs awaiting transformation. Once fried, grilled, or microwaved, they become what many recognize as poppadoms. Regional variations across India influence ingredient choices and flavoring techniques, with different areas developing distinct papad traditions over centuries.
The traditional preparation uses urad dal (black gram) flour as its foundation, though numerous regional adaptations exist. Northern Indian versions tend to be spicier, while southern variations might incorporate rice flour. Understanding these distinctions helps appreciate the authentic preparation process that transforms simple ingredients into crispy treasures served alongside curry dishes throughout India and beyond.
Essential ingredients for authentic homemade poppadoms
Creating restaurant-quality poppadoms begins with selecting proper ingredients. The foundation lies in the flour choice, with traditional recipes relying on urad flour (ground from black matpe beans). This speciality ingredient delivers the authentic texture and flavour profile that defines classic poppadoms.
| Ingredient | Quantity | Purpose |
|---|---|---|
| Urad flour | 2 cups | Primary base that provides structure |
| Salt | 1/2 teaspoon | Enhances flavour |
| Water | ~1/4 cup | Binds ingredients |
| Baking soda | 1 teaspoon | Creates light texture |
| Asafoetida (optional) | 1/2 teaspoon | Adds authentic aroma |
For those unable to source urad flour, alternatives include chickpea flour (besan), garbanzo bean flour, or lentil flour. Each alternative creates slightly different results while maintaining the essential crispy texture. Most specialty ingredients can be found at Indian grocery stores or online retailers specializing in South Asian cuisine.
Beyond ingredients, basic equipment needs include a large mixing bowl, smooth rolling surface, and implements for your chosen cooking method. Investing in quality ingredients ensures authentic flavour profiles that distinguish homemade poppadoms from mass-produced store versions.
Flavorful variations: Customizing your poppadom recipe
The beauty of homemade poppadoms lies in their adaptability to different flavour profiles. Traditional spice additions transform plain dough into personalized crispy treats that complement specific Indian dishes. Experimenting with these flavourings allows you to create signature poppadoms tailored to your palate.
Cumin seeds provide earthy notes that pair wonderfully with most curry dishes. For heat lovers, incorporating chili flakes or finely chopped green chilies delivers warmth that intensifies with each bite. Classic combinations like garlic and black pepper create balanced flavor profiles reminiscent of restaurant-style poppadoms served throughout northern India.
Aromatic additions such as garlic powder or onion powder infuse the dough with savory depth. For authentic regional variations, consider adding ajwain (carom seeds) for Punjabi-style papads or black pepper for southern Indian versions. When incorporating wet ingredients like minced garlic, slightly reduce water content to maintain proper dough consistency.
Each region of India features distinct flavour traditions – Gujarat favors asafoetida and cumin, while Rajasthani versions might include more aggressive spicing with red chili powder. These regional inspirations provide starting points for creating poppadoms that complement specific curry styles or chutney pairings.
Mastering the perfect poppadom dough
Combining ingredients properly
Begin by thoroughly mixing all dry ingredients in a large bowl. This ensures even distribution of salt, baking soda, and any spices throughout the finished poppadoms. Gradually add water while mixing – this slow incorporation prevents lumps and allows careful control over dough consistency.
The ideal dough should feel soft yet firm with slight tackiness. Too much water creates sticky dough that’s difficult to roll, while insufficient moisture results in crumbly papads that crack during preparation. Proper moisture balance constitutes the foundation of successful poppadom making, requiring attention throughout the mixing process.
Kneading techniques for optimal texture
After forming basic dough, pound it vigorously for approximately ten minutes, turning occasionally to ensure even processing. This crucial step develops gluten structures that create the characteristic texture when fried. Follow with hand kneading for 2-3 minutes until the surface becomes smooth and elastic.
To test readiness, perform the stretch test – properly prepared dough stretches noticeably before breaking. This elasticity indicates sufficient gluten development for thin rolling. If the dough tears immediately, continue kneading until the proper texture develops.
Patience during this foundational stage pays dividends in final quality. Properly prepared dough rolls thinly without tearing and cooks with the perfect balance of crispness and flexibility that defines authentic poppadoms served in fine Indian restaurants.
Rolling techniques for perfectly thin papads
Transforming dough into paper-thin discs requires specific rolling techniques. Begin by dividing the prepared dough into walnut-sized portions for consistent results. Each piece must be rolled to less than 1mm thickness to achieve the characteristic crispness when cooked.
- Traditional rolling pin method: Lightly oil your work surface and rolling pin, then press and roll outward from the center. Rotate frequently for even thickness.
- Tortilla press method: Place dough between two sheets of greaseproof paper or plastic and press firmly for rapid, uniform results.
- Pasta machine technique: For ultra-thin, consistent papads, roll partially flattened dough through progressively smaller settings.
Regardless of method, the goal remains achieving uniform thinness throughout. Thicker areas cook unevenly, while paper-thin sections promote ideal crispiness. Professional chefs often use the counter-light test – properly rolled papads should be translucent when held against light.
For perfectly round shapes, use a bowl or cookie cutter after rolling. This creates uniform discs that cook evenly and present beautifully. Store rolled papads between sheets of greaseproof paper to prevent sticking while preparing multiple pieces.
The crucial drying process: From dough to papad
Drying transforms soft dough into shelf-stable papads ready for cooking. This essential step removes moisture that would otherwise cause splattering during frying and prevents proper crisping. Different drying methods suit various climates and time constraints.
Traditional sun drying delivers authentic results in warm, dry climates. Place rolled papads on wax paper in direct sunlight, flipping occasionally until completely dry. This method typically requires 24-48 hours at temperatures around 80-85°F, varying with humidity levels.
For modern kitchens, oven drying provides consistent results regardless of weather. Set your oven to its lowest temperature setting (ideally around 60°C/140°F) and dry papads for 4-6 hours, turning halfway through. Electric food dehydrators offer another reliable alternative, producing evenly dried papads overnight with minimal attention.
Properly dried papads should feel firm yet retain slight flexibility without brittleness. Underdried versions remain soft and may not crisp properly when cooked, while overdried papads become too brittle for handling. The thoroughness of this drying process directly influences the texture and puffiness of finished poppadoms.
Cooking methods compared: Frying vs. grilling vs. microwaving
Deep frying for authentic restaurant-style results
Deep frying represents the most traditional cooking method, creating poppadoms with authentic texture and flavor. Heat neutral oil (like rapeseed or canola) to approximately 190°C/350°F – the proper temperature causes immediate bubbling when papad touches oil. Cook only one or two at a time, turning once with tongs, and remove before browning occurs.
This method requires more oil but produces restaurant-quality results with consistent crispness throughout. The rapid expansion in hot oil creates the characteristic bubbled texture that Indian cuisine enthusiasts recognize from fine dining establishments.
Healthier alternatives: Grilling and microwaving
For health-conscious cooks, alternative methods reduce oil consumption while maintaining flavor. Pan frying uses minimal oil in a hot frying pan, turning when edges curl (about 30 seconds per side). This technique strikes a balance between traditional flavor and reduced fat content.
The microwave method offers the quickest, oil-free approach. Simply place dried papads directly on the microwave plate and cook for 30-40 seconds until crisp. While lacking the rich mouthfeel of fried versions, this technique produces remarkably crunchy poppadoms perfect for casual meals.
Grilling creates unique smoky notes that complement spiced varieties. Place papads on a hot grill or under a broiler, turning every few seconds until crispy. This method adds distinctive flavor while eliminating added oils entirely.
Secrets to restaurant-style flat poppadoms
Achieving the perfect flat poppadom that resembles those served in fine Indian restaurants requires specific techniques. Professional chefs employ several tricks to prevent excessive curling that can interfere with serving and dipping.
Temperature control proves essential for even cooking. Maintain consistent oil heat between 180-190°C to ensure papads cook quickly without burning. Professional kitchens often cook poppadoms in pairs, which helps counterbalance curling forces and maintains flatness throughout the brief cooking process.
Proper tool usage makes a significant difference. Use wide, flat tongs that distribute pressure evenly when turning poppadoms. Quick, confident movements minimize time in oil and prevent uneven cooking that contributes to curling.
For presentation purposes, placing cooked poppadoms under a heavy plate for 30 seconds while still warm helps flatten any stubborn curves. This creates stackable, uniform poppadoms perfect for plating with accompanying chutneys and raitas at your next homemade Indian feast.
Ideal dipping accompaniments for your homemade poppadoms
The crispy texture of freshly made poppadoms pairs beautifully with contrasting dips and condiments. Traditional Indian restaurants typically serve these crispy delights with an assortment of flavorful accompaniments that enhance the dining experience.
- Mint chutney: Cooling mint combined with cilantro, green chilies, and lemon juice creates a refreshing counterpoint to spiced poppadoms
- Tamarind chutney: Sweet-sour flavor from tamarind pulp balanced with jaggery provides complex sweetness that complements savory poppadoms
- Cucumber raita: Yogurt-based dip with grated cucumber, cumin, and mint offers cooling relief alongside spicier poppadom variations
Mango chutney delivers sweet fruitiness that highlights the savory notes in poppadoms. For heat enthusiasts, lime pickle or mixed vegetable achaar provides intense flavor bursts that stand up to even the most robustly spiced versions.
When serving poppadoms as starters or accompaniments to curry dishes, consider flavor balance across your offerings. Combining sweet, spicy, and cooling elements creates a complete taste experience that showcases the versatility of these crispy Indian flatbreads. Arranging these condiments in small bowls surrounding a plate of homemade poppadoms creates an impressive presentation for guests.
Storage solutions: Keeping your poppadoms fresh
Proper storage extends the life of both uncooked papads and finished poppadoms. Uncooked dried papads store remarkably well in airtight containers for up to six months when kept in cool, dry conditions. Ensure complete dryness before storage to prevent mold development.
For long-term preservation, freeze uncooked papads between sheets of wax paper within airtight containers. This method preserves quality for up to a year, requiring only brief thawing before cooking. Batch preparation and proper freezing techniques provide convenience for future meals without sacrificing the authentic texture and taste.
Cooked poppadoms present greater storage challenges due to their tendency to absorb moisture. Store in airtight containers with moisture-absorbing materials like paper towels for 3-7 days. Revive softened poppadoms with brief heating in a 180°C oven or 10-15 seconds in a microwave to restore crispness.
Monitor stored papads for signs of spoilage including discoloration, off odors, or visible mold growth. The quality degrades gradually over time, so using them within recommended timeframes ensures the best flavor and texture experience.
Creating lighter poppadoms for modern appetites
Modern diners often seek healthier versions of traditional favorites. Fortunately, poppadoms adapt well to health-conscious preparations while maintaining their essential appeal. Cooking method selection significantly impacts the nutritional profile of finished poppadoms.
Microwave cooking eliminates added oils entirely, reducing calorie content by up to 70% compared to deep-fried versions. Grilling similarly avoids added fats while introducing appealing smoky notes. These oil-free cooking techniques transform traditional poppadoms into lighter appetizers suitable for health-conscious dining.
Alternative flour choices address dietary restrictions. Chickpea flour creates naturally gluten-free poppadoms with additional protein, while moong dal flour offers lighter texture with similar nutritional benefits. For sodium concerns, reduce or eliminate salt while increasing aromatic spices to maintain flavor complexity.
Portion control plays an important role in healthy enjoyment. Rather than unlimited poppadoms, serve a measured amount alongside plenty of vegetable-based chutneys and yogurt dips. This creates a balanced starter that satisfies cravings without overwhelming a nutritious meal plan.
Elevating your Indian meal experience with homemade poppadoms
Homemade poppadoms transform ordinary Indian meals into special dining experiences. These crispy discs not only serve as appetizers but also enhance main courses through textural contrast. When placed upright in a specially designed poppadom stand or artfully arranged on a plate, they create dramatic visual impact before the first bite.
Beyond traditional serving methods, creative applications abound. Crush cooled poppadoms as textural toppings for creamy curries or dal dishes. The contrasting crunch elevates humble vegetable preparations into restaurant-worthy creations. Indian cuisine experts often recommend enjoying poppadoms throughout the meal rather than solely as starters.
For entertaining, create Indian-inspired canapés using miniature poppadoms as bases. Top with spiced yogurt, chutney, and small garnishes for elegant finger food. These versatile crispy platforms complement both traditional and fusion flavor profiles.
The satisfaction of serving homemade poppadoms alongside your curry creations cannot be overstated. The distinctive crack when breaking these crispy delights signals authentic Indian dining that connects home cooks to centuries of culinary tradition, all while demonstrating care and attention to every element of the meal.